作业1 - 完成删除画布的逻辑
步骤一 在EditWrapper.vue中新增一个div用于用户点击移除对应的l-text
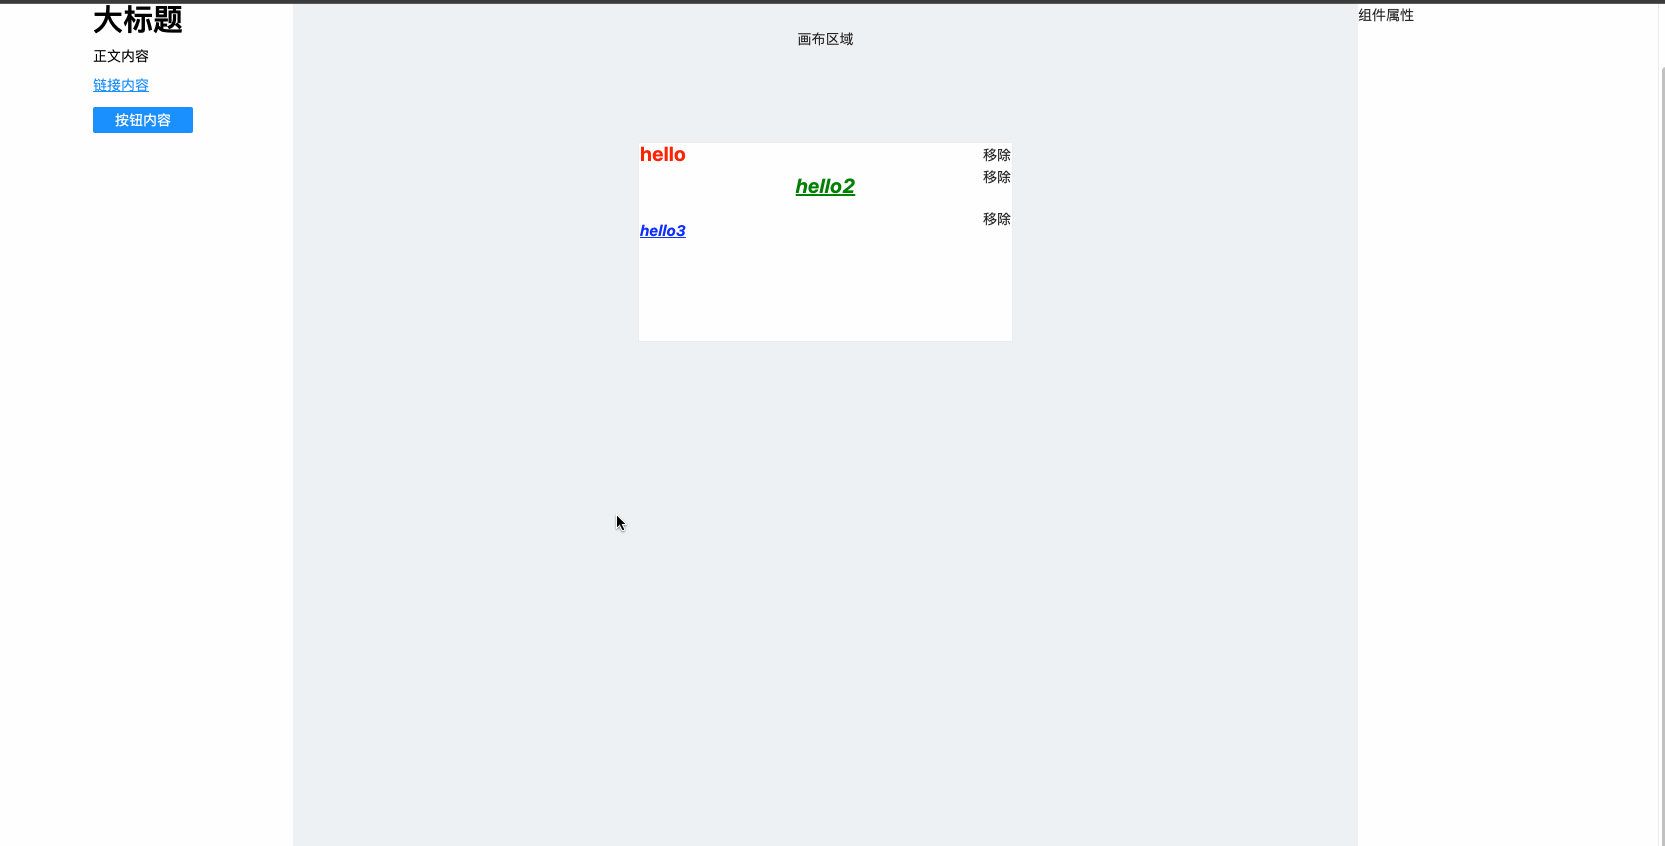
<div class="remove" @click="onRemoveClick(id)">移除</div>
步骤二
定义派发的事件名称
emits: ['set-active', 'removeComponent'],
步骤三 定义点击事件处理函数
const onRemoveClick = (id: string) => {
   context.emit('removeComponent', id);
};
return {
   ...
   onRemoveClick
};
步骤五 在Editor.vue中给EditWrapper组件添加事件
<edit-wrapper
   ...
   @removeComponent="removeComponent"
   >
   ...
</edit-wrapper>
步骤六 在Editor.vue中增加处理函数
const removeComponent = (id: string) => {
   store.commit('removeComponent', id);
};
return {
   ...
   removeComponent
};
步骤七 在store/editor.ts mutations中定义函数处理组件数组,移除当前点击移除的组件
removeComponent(state, id: string) {
  let index = -1;
  for (let i = 0; i < state.components.length; i++){
     if (id === state.components[i].id) {
        index = i;
        break;
      }
   }
   // 移除组件
   state.components.splice(index, 1);
},
最终完成界面更新,无需单独处理
作业2 - 添加更多属性和组件的对应关系
透明度实现代码(propsMap.ts)
  opacity: {
    component: 'a-slider',
    extraProps: {min: 0, max: 100, step: 1, reverse: true},
    text: '透明度',
    initalTransform: (value: string) => parseFloat(value) * 100,
    afterTransform: (e: number) => (e / 100).toString()
  }
加粗、倾斜、下划线实现
步骤一 安装图标依赖
npm install -S @ant-design/icons-vue
步骤二(PropsTable.vue)
组件包括元素添加no-text类名
:class="['prop-item', {'no-text': key === 'textDecoration' || key === 'fontWeight' || key === 'fontStyle' }]"
步骤三(PropsTable.vue)
引入图标组件
import { ItalicOutlined, BoldOutlined, UnderlineOutlined } from '@ant-design/icons-vue';

components: {
  ...
  ItalicOutlined,
  BoldOutlined,
  UnderlineOutlined
},
步骤四(PropsTable.vue)
修改css
.prop-item.no-text {
  width: 32px;
  height: 32px;
  display: inline-block;
  margin-right: 10px;
}

.no-text:nth-child(3) {
  margin-left: 27%;
}
步骤五(propsMap.ts)
fontWeight: {
  component: 'a-button',
  subComponent: 'BoldOutlined',
  text: '',
  valueProp: 'type',
  extraProps: {shape: 'circle'},
  eventName: 'click',
  options: [{value: '',text: ''}],
  initalTransform(value: string) {
    return value === 'bold' ? 'primary' : 'default';
  },
  afterTransform: (e: any) => {
    return e.target.classList.contains('ant-btn-default') ? 'bold' : 'normal';
  }
},
fontStyle: {
  component: 'a-button',
  subComponent: 'ItalicOutlined',
  text: '',
  valueProp: 'type',
  extraProps: {shape: 'circle'},
  eventName: 'click',
  options: [{value: '',text: ''}],
  initalTransform(value: string) {
    return value === 'italic' ? 'primary' : 'default';
  },
  afterTransform: (e: any) => {
    return e.target.classList.contains('ant-btn-default') ? 'italic' : 'normal';
  }
},
textDecoration: {
  component: 'a-button',
  subComponent: 'UnderlineOutlined',
  text: '',
  valueProp: 'type',
  extraProps: {shape: 'circle'},
  eventName: 'click',
  options: [{value: '',text: ''}],
  initalTransform(value: string) {
    return value === 'underline' ? 'primary' : 'default';
  },
  afterTransform: (e: any) => {
    return e.target.classList.contains('ant-btn-default') ? 'underline' : 'none';
  }
}
作业3 - 添加更多属性和组件的对应关系
点击组件跳转问题原因,因为组件内部增加了点击事件跳转,所以用户点击时l-text捕获了点击事件,导致画板上点击l-text时发生了跳转。 解决思路: 如何让l-text无法获取点击事件或者捕获到了不做跳转处理? 方案一: 在外层wrapper下新增一个元素,设置其覆盖在l-text上,且把原本添加到外层wrapper上的点击事件添加到遮罩层上,代码如下: html:
<div :class="['edit-wrapper',{active: active}]" >
  <slot></slot>
  <div class="mask" @click.stop.prevent="onItemClick(id)"></div>
</div>
css:
.edit-wrapper {
  position: relative;
  padding: 0px;
  cursor: pointer;
  border: 1px solid transparent;
  user-select: none;
}
.edit-wrapper .mask {
  position: absolute;
  top: 0;
  right: 0;
  bottom: 0;
  left: 0;
}
缺点:暂时不知道当前处理方式对于后续拖动改变尺寸是否有影响
方案二: l-text新增一个属性,让l-text内部适配判断是否有该属性从而处理点击逻辑
缺点:由于编辑模式和最终发布后都依赖于传入的属性控制最终渲染样式,导致最终在调用接口存储数据的时候需要修改属性值,增加了提交时候的复杂度
效果图
不足:以上方式实现对fontWeight、fontStyle、textDecoration的位置有要求